Django REST Framework
| Due Date |
|---|
Introduction
What is REST and what are RESTful APIs?
Representational State Transfer (REST) is an architectural style that specifies a particular style (and a few constraints), that if applied to a web service render desirable services to work best on the Web , such as performance, scalability, and modifiability. In a RESTful API, endpoints (URLs) define the structure of the API and how end users access data from our application using the HTTP methods: GET, POST, PUT, DELETE.
Here you can learn more about RESTful Web Services
 https://dzone.com/articles/introduction-to-rest-api-restful-web-services
Status codes are issued by a server in response to a client's request made to the server. The server always returns a message for every request, whether it is successful or not. Thus they are helpful to know the state of your code.
What is DRF? Why should I learn it?
Consider that after having completed the CSOC Django Assignment, you now built your own webapp backed with Django as the backend. Overnight your webapp became a star success!! Congrats! They love it so much, that they want a mobile phone version! Time to create an Android Version! And an iOs version....
And then you have to replicate 2 times the same code to Add, View, Remove, Update and Delete data, with different languages.
That opens the door to many possible mistakes… And that is where DRF shines out.....
In short, as DRF uses URIs for accessing the DataBase, we can provide access to the database to any application that can read from, generate and send an URI. May that be an android app, webapp, iOS app etc..
Consider this against using Django without DRF library, where to provide access to Android, iOS in addition to web, you have to replicate 2 times the same code to Add, View, Remove, Update and Delete data, with different languages.
All that DRF provides can be implemented through Django without explicitly using DRF, but it is tedious.
Now that was a good start to understanding DRF, but a developer's understanding and terminologies goes beyond... Offering you this possibility, have a go through the documentation.
Documentation and Installation
 https://www.django-rest-framework.org/
Architecture
A DRF API is composed of 3 layers: the serializer, the viewset, and the router.
- Serializer: converts the information stored in the database and defined by the Django models into a format which is more easily transmitted via an API.
- Viewset: defines the functions (read, create, update, delete) which will be available via the API
- Router: defines the URLs which will provide access to each viewset.
Quickstart
After having installed
 https://www.django-rest-framework.org/tutorial/quickstart/
Searializers
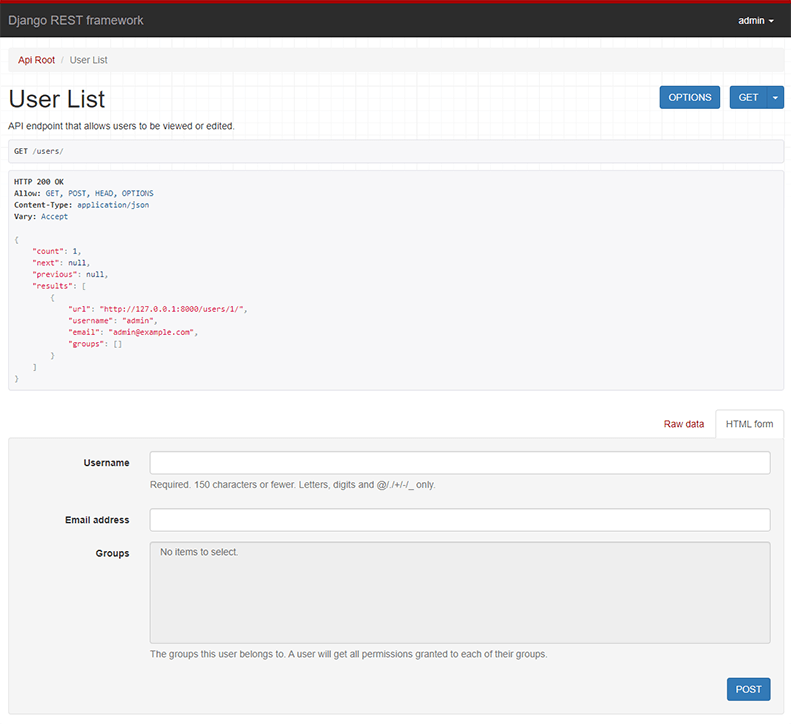
Django models intuitively represent data stored in your database, but an API will need to transmit information in a less complex structure. While your data will be represented as instances of your Model classes in your Python code, it needs to be translated into a format like JSON in order to be communicated over an API.
You can learn about serializers here
 https://www.django-rest-framework.org/tutorial/1-serialization/
Requests and Responses
Well aware that you are about the REST framework, there is nothing better than getting started right away with Django's Request and Responses.
 https://www.django-rest-framework.org/tutorial/2-requests-and-responses/
ViewSets and Routers
A given serializer will parse information in both directions (reads and writes), but the ViewSet is where the available operations are defined. The most common ViewSet is the ModelViewSet, which has the following built-in operations:
- Create an instance:
create()
- Retrieve/Read an instance:
retrieve()
- Update an instance (all fields or only selected fields):
update()orpartial_update()
- Destroy/Delete an instance:
destroy()
- List instances (paginated by default):
list()
 https://www.django-rest-framework.org/tutorial/6-viewsets-and-routers/
Tutorial

Django docs contain a tutorial to build Polls API. You can try implementing the same app using DRF. Follow below tutorials:
Other resources
You can refer to other articles in these websites for better understanding of Django and DRF:
 https://www.agiliq.com/categories/#drf
 https://simpleisbetterthancomplex.com/archive/
Clean Code
One should always use sensible names for views, variables etc. and write clean code. Follow this guide to understand how to name your urls.

Python naming guidelines
Task and Submission
So much for learning, here is your next Assignment!
All the details of the task are provided in the README.md file.
As you are aware, you need to fork from and the repository, clone the forked repository, complete the task, commit and push your changes and finally open the pull request back here.
